• About Us
    • Corporate Philosophy
    • About Solarius
    • Markets and Perspectives
    • Quality Commitment
    • Solarius History
    • Management Team
    • Jobs & Career
  • Products & Services
    • Standard Systems
    • Viking
    • Polaris
    • Atlas
    • Modular Solutions
    • AOP Custom
    • AOP Custom TTV
    • SEMI BGA
    • Automated Solutions
    • Matrix 3000 HVM
    • SIMP - Wafer Inspection
    • AMT - Battery Packs
    • Support & Services
    • Service & Support
    • Job Measurements
    • Development Service
  • Applications & Solutions
    • Consumer Electronics
    • Automotive
    • Semiconductors
    • Aerospace
    • Optics & Displays
    • Energy
    • Machinery
    • Print & Paper
    • Medical
    • Parameters
  • Technology
    • Optical 3D Metrology
    • Solarius SolarCore Software Platform
    • Optical Sensor Types
    • Imaging Technologies
    • Technology Guide
  • News & Events
  • Contacts
    • Global Solarius Network
    • Sales & Service Partners
  • EN
  • DE
  • 中文
  • Home
  • Applications & Solutions
  • Parameters

Reach us
+86 21 6121 9491
  • Applications & Solutions
  • Consumer Electronics
  • Automotive
  • Semiconductors
  • Aerospace
  • Optics & Displays
  • Energy
  • Machinery
  • Print & Paper
  • Medical
  • Parameters
shutterstock_512725252_web.jpg

The parameters for the measurement of technical surfaces in the micro- and nanometer domain range from a simple acquistion of length in Cartesian coordinates to internationally standardized complex surface parameters for roughness, form and geometry. While for laboratory and development oriented work visualization of surfaces and 3D geometries is most important, judgement on good / bad criteria must be fully automated, based on parametric measurement results, in high volume manufacturing and critical quality assurance. In this connection, fast and reliable 3D image processing plays a decisive role in convertion of surface image data into reliable dimensional parameters. Solarius disposes of a long term experienced software team creating ideal solutions for image processing and complex machine control, being your ideal partner for challenging metrology tasks.

3D Optical Measurement Parameters

180614_3D_Roughness_web.png

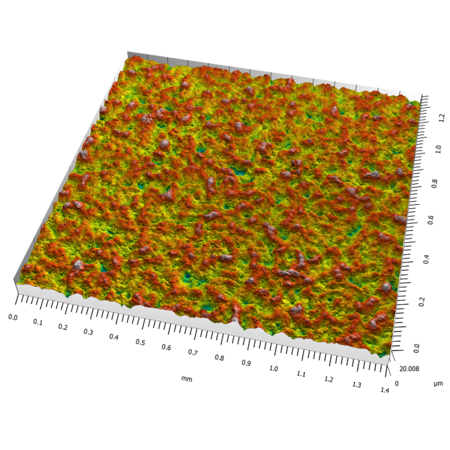
3D Roughness

Slowly replacing the evaluation of 2D profiles, optical 3D surface measurements enable the more informative roughness values of the ISO 25178, determining 3D surface characteristics. The Solarius Polaris 3D inspection provides ideal combination of resolution and speed to meet roughness acquisition requirements.

  • Consumer Electronics
  • Automotive
  • Semiconductors
  • Machinery
180614_2D_Roughness_web.png

2D Roughness

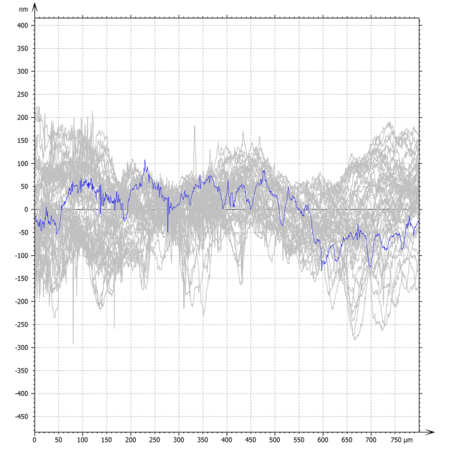
2D roughness is a well established parameter describing evenness of a surface. Evaluation according to ISO 4287 provides internationally standardized roughness values for the control of technical surfaces. The Solarius Viking is an efficient profilometer to acquire ISO compliant 2D profile data on any surface and material.

  • Automotive
  • Optics & Displays
  • Machinery
  • Print & Paper
  • Medical
180614_ContourShape_web.png

Contour & Shape

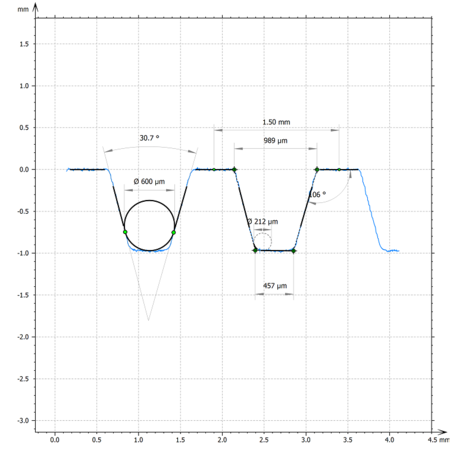
Measuring 3D shape of an object is more than just measuring distances and heights. It is the exact determination of continous geometric parameters such as curvature, diameter, angle and texture. The ultra fast Solarius Atlas 3D interferometric sensors allow most robust 3D measurements in only a few milliseconds.

  • Automotive
  • Semiconductors
  • Energy
  • Machinery
  • Medical
180614_Particles_web.png

Particle Inspection

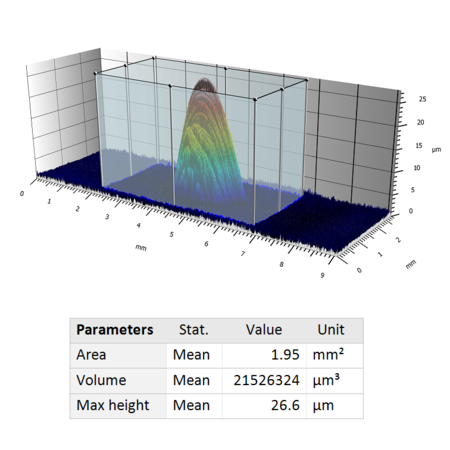
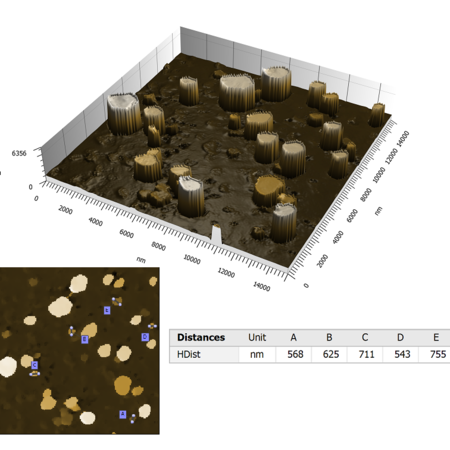
3D particle inspection is most important when stacking functional devices, avoiding piercing of critical layers. Particles are separated from underneath surfaces and become measured in diameter, height and distribution. Contributing high 3D resolution Solarius Polaris inspection tools quickly detect even smallest particles.

  • Semiconductors
  • Optics & Displays
  • Energy
  • Print & Paper
  • Medical
180614_Distance_web.png

Distance

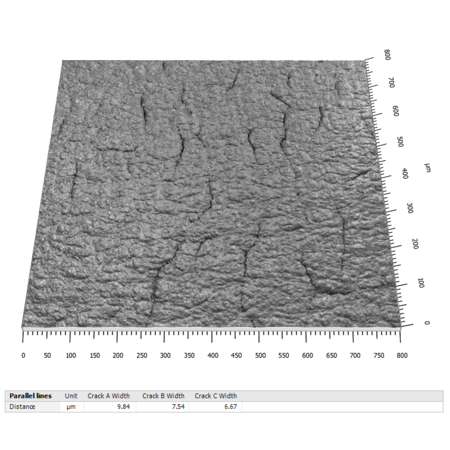
Simple 2D distance measurements become complex when dimensions must be acquired at e.g. the bottom of trenches. Measurement of width between two points, lines or planes on complex 3D surface shapes can easliy be done using different Solarius Standard Products, available for individual scopes of application.

  • Automotive
  • Semiconductors
  • Energy
  • Machinery
  • Medical
180614_Volume_web.png

Volume

Measuring volumes of cavities or bodies goes back to determining 3D topographies in spatial dimensions, mathematically integrating derived measurement data to volumes. Depending on individual speed and accuracy requirements, Solarius Atlas and Polaris 3D inspection tools mark the ideal spead of available functionality.

  • Consumer Electronics
  • Semiconductors
  • Print & Paper
180614_Straightness_web.png

Straightness

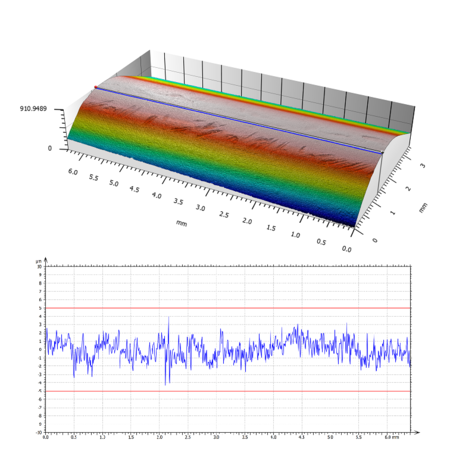
A surface is said to be straight over a given length, if the variation of the distance of its points from two planes, perpendicular to each other and parallel to the general direction of the line, remains within the specified. Surface straigthness is best measured by using the customizable Solarius AOP system platform.

  • Semiconductors
  • Optics & Displays
  • Energy
  • Machinery
180614_StepHeight_web.png

Step Height

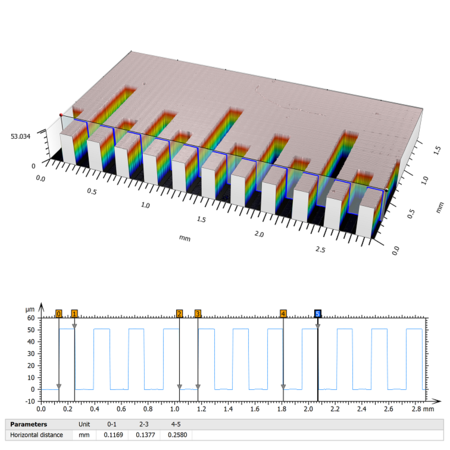
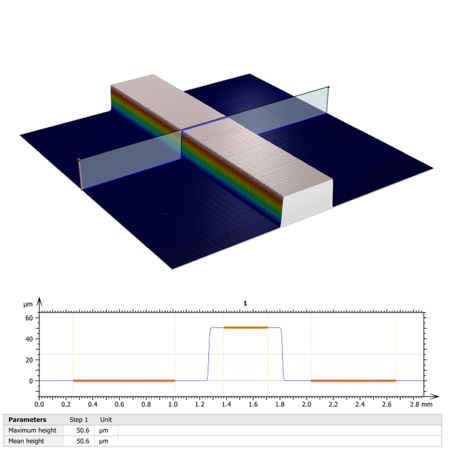
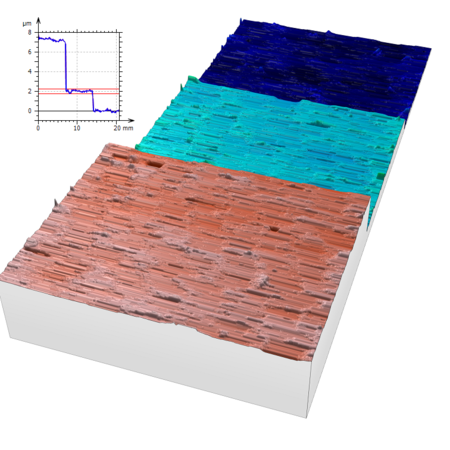
Differences in height can be measured at two or more "steps" where one of them serves as a reference plane. Step height results can be obtained from either single points, profiles or surfaces. A most cost efficient way to acquire step height data is unsing the Solarius Viking profilometers for 2D and 3D measurements.

  • Semiconductors
  • Optics & Displays
  • Energy
  • Print & Paper
  • Medical
180614_GrainAnalysis_web.png

Grain Analysis

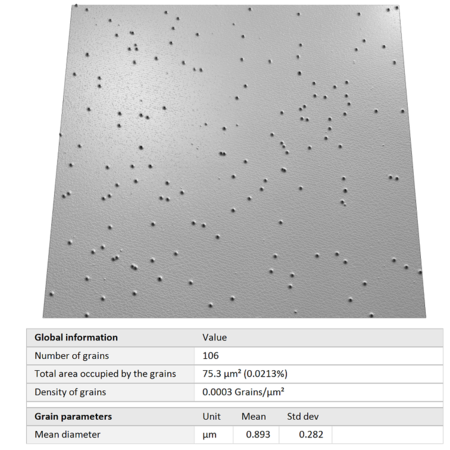
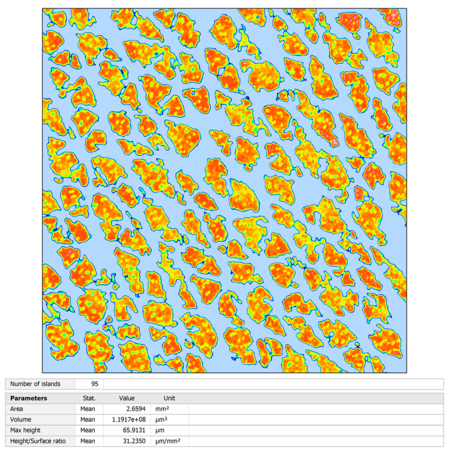
Grain analysis is a part of mechanical process engineering linked to materials science. Material property is typically statistically distributed on surfaces. Primary goal of the grain size analysis is the determination of the prevailing particle size distribution. Ideal tools are the Solarius Polaris 3D microscopes.

  • Automotive
  • Energy
  • Machinery
  • Medical
180614_Flatness_web.png

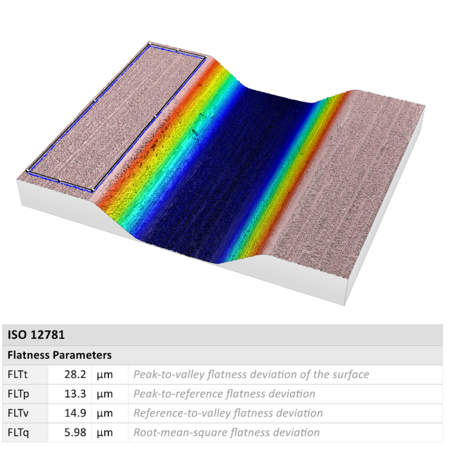
Flatness

Flatness is the quality of having a created surface without raised areas or indentations. In metrology, flatness is indicated by tolerance limits defined by two planes, one above and one below the created surface, each parallel. Suitable 3D metrology for this purpose provide Solarius Atlas and Solarius AOP systems.

  • Semiconductors
  • Optics & Displays
  • Machinery
  • Print & Paper
180614_Transparent_Thickness_web.png

Transparent Thickness

Transparent surface layers are found in various applications in automotive, semiconductor and medical industry, being created by coating or deposition processes. Function depends on thickness, homogeneity and total thickness variation. The Solarius Polaris systems provide must accurate layer measurement results.

  • Automotive
  • Semiconductors
  • Optics & Displays
  • Medical
180614_BumpInspection_3D_web.png

Bump Inspection

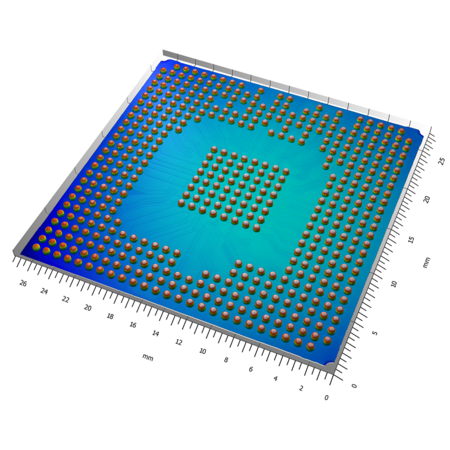
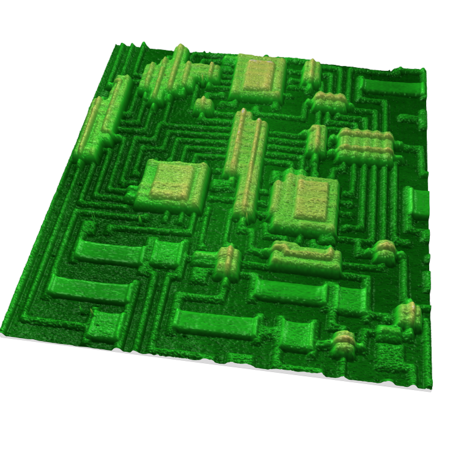
While wire bonding stays a method of choice for heavy duty connections in semicondutors, ball grid arrays (BGAs) are indispensable for 1st and 2nd level interconnects since many years. The arrays are tested for planarity, diameter uniformity, misplacement and missing items by the specialzed SEMI BGA inspection tool.

  • Consumer Electronics
  • Automotive
  • Semiconductors
180711_Waviness_web.png

Waviness

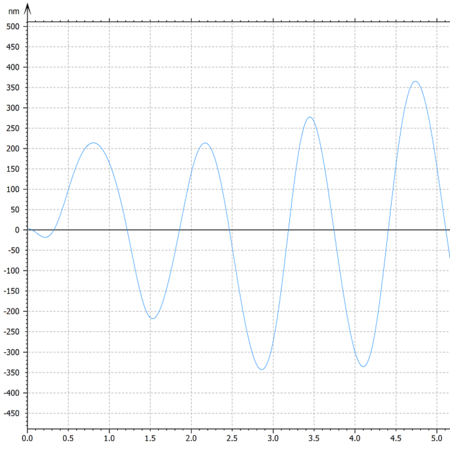
Waviness determines, in addition to the roughness of a surface, its appearance, especially in paint finishes. For surfaces with mechanical function, the ripple is essential for lifetime and precision of the components. Solarius Atlas 3D measuring systems enable the testing of ripples on different object sizes.

  • Consumer Electronics
  • Automotive
  • Optics & Displays
  • Machinery
180711_Positioning_web.png

Positioning

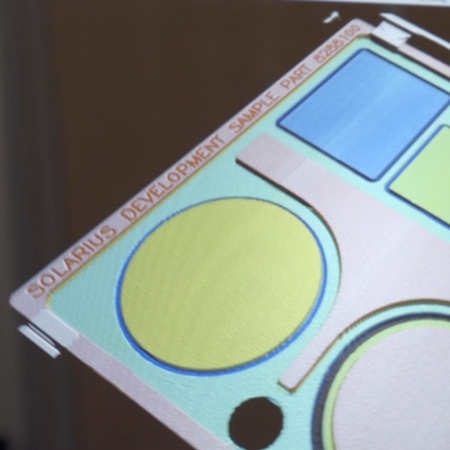
The function of integrated systems depends on the precise positioning of electronic and micromechanical components whose positions must be determined. While with component positioning, the speed of the Solarius Atlas 3D inspection is convincing, in micromechanics, the accuracy of the Polaris systems impresses.

  • Consumer Electronics
  • Automotive
  • Semiconductors
  • Optics & Displays
180615_NanoChar_web.png

Nano characterization

In science and industry nano geometries are often characterized by complex methods such as scanning electron microscopy. Optical 3D measurement techniques such as interferometry or confocal microscopy, available on Solarius Polaris products, provide a much simpler and cost-effective alternative.

  • Semiconductors
  • Optics & Displays
  • Medical
180615_VoidVolume_web.png

Void Volume Calculation

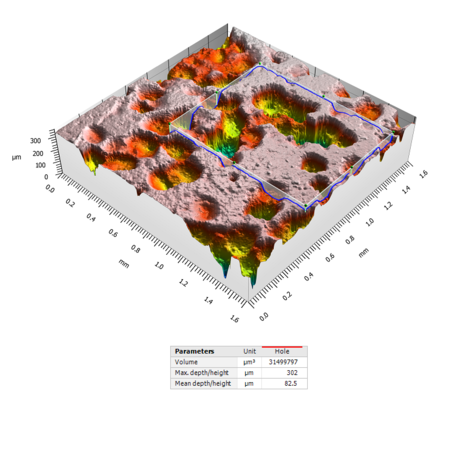
In order to permanently wet technical surfaces with the right amount of oil or to ensure the adhesion of the correct amount of paint in gravure printing, the incorporation of certain recesses and geometries in surfaces is crucial. Solarius Polaris 3D measurements allow an exact calculation of such void volumes.

  • Automotive
  • Machinery
  • Print & Paper
  • Medical
180711_Parallelism_web.png

Parallelism

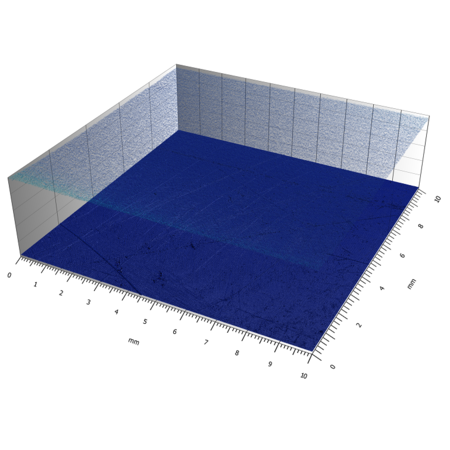
Parallelism describes the deviation in the positional relationship of two surfaces. It is understood as the maximum deviation of a plane to another plane, ideally parallel to the reference. Solarius Atlas 3D inspection allows determination of parallelism using confocal sensors, triangulation or interferometry.

  • Consumer Electronics
  • Automotive
  • Optics & Displays
  • Machinery
180710_PoreInspection_2D_web.png

Pore Inspection

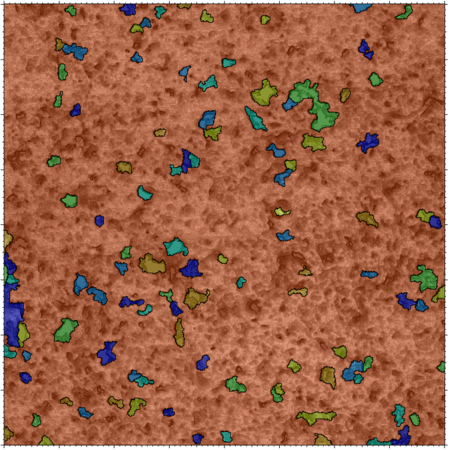
Technical surfaces may intentionally and unintentionally have pores which, depending on their size, define the properties of a surface. Such pores can be detected with optical 3D inspection, for example with Solarius Polaris 3D metrology systems, and be measured in lateral and vertical extension and distribution.

  • Automotive
  • Optics & Displays
  • Print & Paper
  • Medical
180615_TextureDirection_web.png

Texture Direction

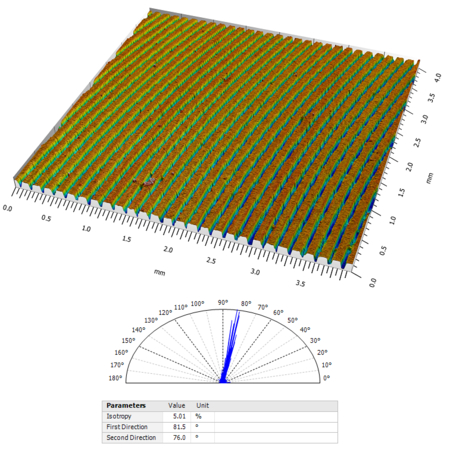
Surface textures, in some cases, deliberately have preferred directions in their structuring or it is attempted to avoid them. In both cases, the presence or geometry and character of such textures can be reliably determined by using 3D measurements, made with different Solarius 3D inspection systems.

  • Optics & Displays
  • Machinery
  • Print & Paper
  • Medical
180615_DefectInspection_web.png

Defect Inspection

A defect detection generally searches for errors of a surface or a geometry. These can be scratches, cracks, breakouts, buildup, deposits and other structural defects. The various Solarius 2D and 3D inspection systems quickly and reliably find even the smallest defects on almost all materials.

  • Consumer Electronics
  • Automotive
  • Semiconductors
  • Optics & Displays
Move to top
  • About Us
  • Products & Services
  • Applications & Solutions
  • Technology
  • News & Events
  • Contacts

Tech Center China
1089 Qinzhou North Road
Hongqin Park
Blk#51 Unit#601
200233 Shanghai
Peoples Republic of China

  • +86 21 6121 9491
  • inquiry@solarius-asia.com
  • Global Network
© Solarius GmbH 2018
Region: Asia
  • America
  • Europe
  • Asia
  • Legal Notice
  • Data Protection
  • Terms & Conditions
You are switching to the american website

You are intentionally switching to the Solarius website for America. By doing so you accept the terms of service and the local legal situation, i.e. the no applicability of the EU GDPR!

Cancel Accept & Continue
You are switching to the european website

You are intentionally switching to the Solarius website for Europe. By doing so you accept the terms of service and the local legal situation, applicable for this region!

Cancel Accept & Continue
You are switching to the asian website

You are intentionally switching to the Solarius website for Asia. By doing so you accept the terms of service and the local legal situation, i.e. the no applicability of the EU GDPR!

Cancel Accept & Continue